Electrical Connections

28 February 2009

To connect your Zumo or any other electrical device requiring a switched power supply, you can tap into the CAN-Bus connector on the 'tank'.


To get under the fake tank, you need to remove the seat and six torx bolts. Four on the top tank panel, and two either side of the headstock, mounted in the black plastic that forms part of the ignition/socket assembly:


The tank panel now lifts straight off but be careful of the power socket wiring underneath:


A closer look at the power socket wiring connector:


The wires are attacked with a spring clip. You have to press down with your thumb to release it, then pull straight off the socket:


Ooh look, what is this mysterious black box thing attached directly on top of the battery? Notice as well the space between the battery and the airbox. This vertical gap will accomodate the newer Autocom units. Or a secret supply of currency.


Pull it out of the mounting clips, and remove the black cap. There is another spring clip holding the black cap on. And inside? This:


Which is our very obviously placed GPS connector. To connect your GPS unit to this can-bus controlled switched supply that stays on for a few minutes when you turn the engine off, you will need part number 80 00 0 611 656 (UK) or 83 30 0 413 585 (US - can someone verify please?) from your friendly local BMW Dealer:


You could buy the cable ready-made from Touratech if you don't want to butcher your original cable.


CAN-Bus Ready Made Cable
from Touratech


Alternative Options:


You could wire your Zumo directly back to the battery with an in-line fuse. You can buy the ready made cable from touratech:


Or you could wire your cable to a DIN plug and plug it into the DIN accessory socket next to the ignition. The plug cost around £3, but you can buy a ready-made cable from touratech:


Other Electrical Connections:


NOTE: Powerlet and BMW/DIN sockets are the same size, and the plugs are interchangeable. They are the same thing. Cigar sockets & plugs are bigger, like the one in your car.


You can add an additional accessory socket to the right of the ignition key and power it from the CAN-Bus connector. There is a cut-out on the underside of the 'tank' panel to show where to place the additional socket You do not need an in-line fuse for CAN-Bus connections.


You can buy a socket kit ready-made to plug into the CAN-Bus from Powerlet


CAN-Bus can support up to 5amps, so electrical devices with a greater power draw (such as a heated jacket perhaps) will need an accessory socket. You could wire an additional accessory socket (BMW/DIN/Powerlet or cigar lighter size) to the right of the ignigition key (see picture above) and wire it back to the battery directly - this supply would not switch off with the ignition. You will need an in-line fuse between the socket and the battery.


You can buy a socket kit for the fake-tank cut-out, ready-made with inline fuse to wire directly back to the battery from Powerlet.

You can also buy handle-bar mounted sockets to wire back to the battery.

Touratech do a full dashboard for the 800GS/650GS(Twin) that includes an additional accessory socket.


Powerlet do a full range of Powerlet sockets and plugs, as well as Cigar sockets & plugs and SAE 2-pin connectors.

They also do adapters beween the different plug types.


Also a full range of power cables to power your iPod, radar detector, USB, heated clothing etc. from a Powerlet socket.


Finally, if you have several devices to wire back to the battery you might consider a fuse panel, like the one AP-1 Centech Fuse Panel from Nippy Norman in the UK


This little box means only one connector to the battery, then you can quickly add wires to the box and each line is fused, meaning no need for in-line fuse.


Hope this helps someone.


Read more...

Crash & Bash Protection

Available (January 09) or soon-to-be-available protection options fall into two main categories:

Crash Protection and Bash Protection

Crash Protection in the form of Engine Bars. Crash bars are not going to protect your bike in all circumstances, and in the case of a hard smash might even transfer energy to your engine housing. However, for low speed spills and 'adventure' drops, they will save you having to replace expensive plastics and indicators. For everything else there is insurance.

Bash Protection in the form of bashplates and handguards. Bashplates cover the lower front engine and the underside, sometimes extending as far back as the catalytic convertor. Most of them will need removing to change the oil filter.The metal bar in the BMW handguards arguably offers some crash protection for your levers.


NOTE: Bashplates will fit 800 and 650 models, however 650 owners will need a fixing kit from BMW, which includes the necessary 'silentblock' rubber vibration-proof mounts and bolts. (800 owners have this as standard with the stock bash plate). Some plate manufacturers may include this kit - check with them directly


Manufacturer offerings in Alphabetical order:


Adventure-Spec

Adventure-Spec bars are still in production, so no prices yet. Latest prototype looks like this:


Adventure-Spec Bashplate £130 silver or £140 black


BMW:

BMW crashbars, not yet available (August '08) approx £226


Metal BMW Enduro Bashplate £147, plus fixing kit for 650 owners only £23.69 (plastic bashplate standard on 800GS comes with fixing kit):


This BMW bashplate was powder coated by the owner. Notice that this plate extends as far back as the cat.


BMW Protector Bar & Screws £63.68 with large guard £23.50 and small guard £19.50 and spoiler £16


Also, it is possible to fit the 2008 1200GS handguards to the 650 and maybe 800.


Givi

Givi Engine Bars £103


Hepco Becker

Hepco Becker Engine Bars approx $200


Image from these forums, credit to
gasman


No doubt HB will have a bashplate at some point in the future.


Metal Mule

Metal Mule bashplate £139

MM also doing crash bars for UKP199. See here


SW-Motech

SW-Motech Crash Bars £121 (available in black, shown in red for clarity)


SW-Motech Bash Plate £131/800 or £140/650 (available in black, shown in red for clarity)


Touratech

Touratech Crash Bars Lower £162.93 and Upper extension £78.01


Touratech Small Bashplate £77.02


Touratech Bashplate extension £43.44 (to fit BMW centrestand)


Oil Filter Guard £53.42


Touratech Handguards £74.06 and spoiler £19.75 all available in different colours


Wild At Heart

A South African company making their own crash bars. SAR3,980 or Approx US$435.
http://www.wildatheartadventure.co.za/bmw800gs.html


Wunderlich


Wunderlich Adventure Crash Bars 179€


Wunderlich Street Crash Bars (no pic available) 169€


Wunderlich Bash Plate 219€ and main stand protection plate 69€


Wunderlich Rectifier protector 35€


******************


I'm sure that manufacturers will expand their range of offerings. However, this brings together all the current options into one place for comparison.


Hope this helps.


Read more...

Tyre FAQ

Talk about tyre pressures, tubes, rim locks and puncture repairs.


Wheel Specs:

Rim, front 2.15 x 21"
Rim, rear 4.25 x 17"

Tyres, front 90/90 - 21 54V
Tyres, rear 150/70 - 17 69V


What pressures should I run my tyres at?


For stock tyres:

FRONT one-up: 2.2bar/32psi at 20 degrees celcius
FRONT two-up and/or with luggage: 2.5bar/36psi at 20 degrees celcius

REAR one-up: 2.5bar/36psi at 20 degrees celcius
REAR two-up and/or with luggage: 2.9bar/42psi at 20 degrees celcius

A quick internet search will throw up correct pressures for alternative tyres. 2.2front/2.5rear seems to be common. On the road I quite liked 2.5front/2.9rear only one-up on the stock Battlewings.


Can I use Tubeless Tyres on the 800GS?

Yes, Tubeless tyres (TL) are fine. So are tube-type (TT) tyres. See Chart above. But either way you will still need a tube (see rim sizes above).

That's because the wheels have spokes and air will leak out if you don't have a tube. The 1200GS has special spoke that go to the side of the wheel so their owners can use tubeless tyres - you can't on your 800GS.


Do I need Rim Locks?

Probably not, unless you're planning to do the Paris-Dakar on the 800GS in which case you should know a lot more about tyres and tubes already.


How do I check pressures at 20 degrees celcius?

Set the climate control in your garage to 20 degrees celcius and only ever check your pressure in there.

OR...bear in mind that a change of 10 degrees celcius is equivalent to a change of about 0.07bars or 1psi. So on a near freezing day increase pressure by about 0.14bars/2psi or on a very hot Death Valley kind of day reduce pressure by 0.14bars/2psi. This applies to 'cold' tyres that haven't been ridden on recently, I have no idea how hot your tyres will be after a few trails.


Should I reduce pressures when off-roading?

If you're going on sand, gravel or very gloopy mud you can maybe lose 5psi/0.4bars but much less and you risk 'tyre slip' where the wheel spins but the tyre doesn't. This will result in the tube valve being ripped out and sudden deflation. You could deflate more and use rim locks (see above).

Put it this way: the BMW Off-Road schools runs their 800GSs off road at road pressures. 'nuff said.


If I want to repair a puncture out on the trails, what tools will I need?


  • 22mm socket for front axel

  • 24mm socket for rear axel

  • a wrench for the sockets

  • Torx keys for M8 and M10 torx bolts (front axel clamps and front brake calliper)

  • Tork key for the ABS sensor if you are clumsy and might knock it when removing/replacing wheel

  • A centre stand (or lie the bike down)

  • A large rock/block to go under the engine when you want to remove the front wheel on the centre stand (or lie the bike down)

  • Tyre levers (two or three, depends how good you are)

  • Rim protectors or bits of plastic bottle (so you don't scratch the rims, depends how precious about your bike you are)

  • A bead breaker (or thick heavy boot heal)

  • Some 4"X4" or something to rest the wheel rim on while you break the bead with your boot, or you will knacker the sprocket/brake discs. Or you can dig a hole in the dirt.

  • Valve removal tool (to take the valve out of the valve stem to deflate the tube enough to get it out)

  • A little spanner (wrench) to remove the lock nut on the valve stem

  • A puncture repair kit (patches/glue) or a spare tube

  • A inflation device (CO2 cartridges, electric compressor or hand pump)

  • Some prior knowledge of how to repair a puncture. Best to practice at home before you need to do it for real.

Good grief thats a lot of stuff for a puncture? Isn't there any easier way?

Yeah. Push bike to nearest road. Phone BMW assist.


Har Har. Can't I just plug the tyre?

No, its got a tube, remember? Should have bought the 650GS.


What about tyre sealant? Can I use that?

Bit late once you have a puncture. There are special formula sealants for tubed tyres. Messy stuff though, and it won't work on gashes or big punctures, but it will gloop everything up and make the tube irrepairable. Also, a small nail in the tyre can cause a large rip in the tube as the tube 'squirms' inside the tyre at speed.


Any other advice?

Practice repairing punctures at home, until you are confident about removing wheels and tyres. Learn how to fix these things in your garage at home when its easy to get help. Once it is second nature, out on the trails it won't be an issue for you.

Oh, and make sure your riding partner has a spare inner tube also. If he gets a puncture and takes your spare, you can guarantee you will get a puncture a mile later. And you can guarantee he won't take your spare off his wheel now...


Read more...

Tyre Options

Wheel Specs:


Rim, front 2.15 x 21"
Rim, rear 4.25 x 17"

Tyres, front 90/90 - 21 54V
Tyres, rear 150/70 - 17 69V


BMW Recommended Tyres:


Road Bias:

Front: Michelin Anakee, 90/90-21 M/C TL/TT (54V)
Rear: Michelin Anakee C, 150/70 R17 M/C TL/TT (69V)


Front: Bridgetstone Battlewing 501 G, 90/90-21 M/C TL/TT (54V) COMES AS STOCK
Rear: Bridgestone Battlewing 502 G, 150/70 R17 M/C TL/TT (69V) COMES AS STOCK


Off-Road Bias:

Front: Metzler Karoo (T) Front, 90/90-21 M/C TL (54Q)* M+S
Rear: Metzler KAroo (T), 150/70 -17 M/C TL (69Q)* M+S


Front: Continental Twinduro TKC80, 90/90-21 M/C TL (54Q)* (Not manufacturered yet, go for the 90/90 54T model at present)
Rear: Continental Twinduro TKC80, 150/70 B17 M/C TL (69Q)*


* These tyres are rated Q (160km/h or 99mp/h) instead of V but can be used if "the permissable top speed is indicated by readily visible means (e.g. sticker affixed in the rider's field of vision)".


Tyres not mentioned by BMW:

The load index & size matches with slightly reduced speed rating are:


Front: Pireli Scorpion MT90 A/T 90/90 -21 TL 54V M/C
Rear: Pirelli Scorpion MT 90 S/T 150/70 R17 TL 69H


Front: Avon Distanzia AM43 90/90 -21 TL 54T
Rear: Avon Distanzia AM 44 150/70 R17 TL 69V


Front; Metzeler Tourance 90/90 -21 TL 54H M/C
Rear: Metzeler Tourance 150/70 R17 TL 69V


Front: Heidenau 90/90 - 21 M/C TL 54H K 60
Rear: Heidenau 150/70 B17 M/C 69T TL K60

TKC80 style tyre


Front: Heidenau 90/90 - 21 M/C TL 54H K 76
Rear: Heidenau 150/70 - 17 M/C TL 69H K 76

Tourance - style tyre


Edit 23/6/09:
Conti now have the ContiTrailAttack available:


Front: 90/90 - 21 M/C 54 H TL
Rear: 150/70 R 17 M/C 69 V TL

Recommended pressures are 2.5/2.5 or 36psi/36psi


Read more...

Scotland In September

I had a week in Scotland planned since I picked up the 800GS in March. Then I had to wait for luggage to be made, and work kept sending me to Singapore...finally, only six months later I made it up North this last week.


The weatherforecast was for 5 days of sunshine and good weather...that turned out to be a load of lies. I whizzed up the M1 > A1 > A66 (stopped at Scotch Corner for a bacon buttie - don't use the services but stop at the hut in the layby at the start of the A66!) Then picked up the B7076 at Gretna as an alternative to the M74. It follows the same route and is a tad slower but much quieter than the motorway. After that I took the B7078 to Kirkmuirhill and picked up the M74/M8 to breeze through Glasgow. Picked up the A82 to Loch Lomond and made camp for the first night in Luss.


The end of September is a quiet time for camping, even at popular spots like Loch Lomond. When I woke up to this view the following morning, I knew I was on vacation:


I packed up and followed the A82 and A830 to Mallaig spent 90 mins waiting for the ferry, having just missed one.


The ferry took me to Armadale on Skye on the Southern tip.


Then I pootled up the west coast of Skye enjoying the views and dodging the odd shower.I made the north-west corner of Skye, a place called Dunvegan and decided I liked the views enough to stop for the night and pitch camp at a campsite.


Again, the campsite was almost empty, apart from a group of bikers, including a lass with a very interesting 'blade...


More showers through the night and down to about 8 degrees so quite chilly! The rain and sun in the morning made for some fabulous sights. It was like nature's own light show while I had breakfast.


Tempted as I was to go looking for the gold, I headed back down the east coast of Skye.


I was headed for the bridge over to Lochalsh but instead ended up taking a little road from the A87 to Kyle Rhea. This road was amazing. Single track, up and down, twisty turny all over the place...the bike seemed to be in its element I mean, riding up from Loch Lomond and around Skye there were some great roads, but this was incredible.I found a little turn-table ferry at Kyle Rhea to take me to Glenelg.


The road from Glenelg to Shiel Bridge was also brilliant, much like the one to Kyle Rhea. Then I followed the A87 for the obligatory Eilean Dolan Castle visit:


You know what is coming next, don't you? The A890 and A896 to Tornapress:


Yep, the infamous road to Applecross. Having heard to much about it, I couldn't really pass up the chance, could I? Unfortunatly, straight after the above photo, the skys opened with a vengenace known only in Scotland. The mists decended and visibility above 1200ft was down to about 50yds. So...not ideal conditions for the Applecross road. What I can say is that apart from a couple of hairpins, the road is very similar in style to the roads to/from the ferry at Kyle Rhea and because the weather was good then, I enjoyed those roads more.

From Applecross I followed the coast road around to the A896 again - this is another great road. Evening the pouring rain and freezing cold. My original plan was to keep the sea on my left and follow the coast up to Gairloch for the night...however by mid-afternoon I was so cold and wet I decided to stop and a posh hotel in Torridon for a coffee...and ended up paying for a room and staying the night. Very nice it was and gave me a chance to dry out my kit and tent.The following day the weatherforecast was for a cold wet front moving in from the North. My night on Skye was cold and wet enough for my liking, despite the second set of thermals I had to buy and was wearing in addition to my normal gear. So in an attempt to stay ahead of the weather I turned east and south the following morning taking the A382 to Inverness and then the B862/B852 down the south side of Loch Ness.


The rain paused long enough for a quick photo.


Other than that, it was non-stop freezing rain all the way. So I bolted down past the Green Welly A82/A85/A84 to the Queen Elizabeth Forest Park and stayed the night in a log Cabin near Loch Earn in Balqhidder. I guess it was low season so they did me a nice deal for the night, and another chance to dry out and get warm again.The following morning I headed down the Duke's Pass (again in the pouring rain) which is another not-to-be-missed road. I bolted down the A68 and some back roads to Kielder in Northumberland to revisit some places I hiked in my teens. And because the weatherforecast showed no clouds over Northumberland.


At the campsite, they had a couple of these weird scandanavian sheds (called "pods") available, and I figured for an extra £5 I could at least stand up, and avoid pitching my tent in the rain again.


Northumberland National Park and Kielder Forest have logging roads all over the place - and as the weather broke it was still early I had a couple of hours hooning around off-road and I appreciated once more what an amazing machine the 800GS is. She needs some cleaning and TLC and I wonder if that exhaust will ever been shiny again. The smell of cow dung cooking on the engine block is not one I will forget in a while.


Overnight stayed dry, but the lack of cloud cover dropped the temperature to 3 degrees I decided that October was no longer camping weather and make the decision to head home. But not before one of the highlights of the trip. Heading east from Kielder, there is a Forest Drive of 12 miles. Its a £3 toll road that I had hiked 20 years ago.


I planned all along to take the bike down this road, so my morning brightened considerably with this nice bit of logging track. Just me and the bike in the middle of nowhere.


Then I picked up the A68/A1/M1 and some tedious motorway miles home. Overall it was a good blast, but tempered with some rain and freezing weather. That third day leaving Skye and doing Applecross was some of the best biking of my life, and the last couple of days off-roading was brilliant.


I had TCK80s on the 800GS for this trip, after falling off in mud in Derbyshire a few weeks back on the battlewings. Pretty squared off now after a couple of thousand miles. Even on the twisties in the rain I didn't feel I was anywhere near the edge of the tyre's grip, they are much better than I am. I was also surprised at the speed I was carrying into some corners - when you glance down and see you're doing 60mph in the rain on a flip-flop stretch I guess there must be a lot of confidence in the bike and tyres!


I had to reign it in a bit at times. Given how fast they wear I don't think I will go with the TKC80s again, maybe Tourance next time. I think they would have coped ok with the terrain I did, and certainly the motorway miles a lot better.The fuel gauge was interesting too...reporting 80+miles or so left after riding for 180miles when the reserve light comes on...not good. But although cafes & garages are few and far between in these parts, there always seems to be one just when you need it.


Erm, that's it, I think.

Read more...

About This Blog

I had been saving for a ST1300 for a long time, as it was clear that my Deauville wasn't up the task.

In November 2007 I saw pictures of the F800GS and ran to the dealers to place a deposit.

On 13th March 2008 I took delivery and have never regretted it.

On 13th April 2009 my 800GS joined me in Singapore for a new life and adventures...

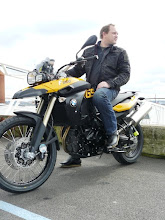
This is my F800GS Blog.

Followers

  © Blogger templates Newspaper by Ourblogtemplates.com 2008

Back to TOP