Malaysia - Fraser's Hill & Melaka

27 March 2010

Photobucket
 After a hectic few months at work, I managed to book a couple of days off for a solo trip north into Malaysia.

Long stretches of motorway, torrential rain, mad drivers and a whole heap of the world's best roads.


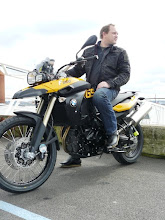
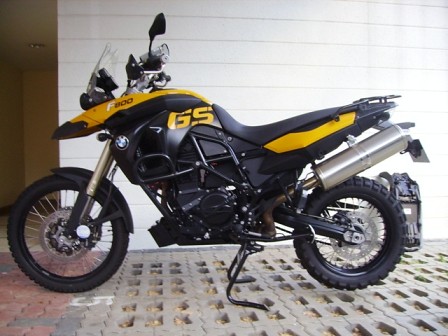
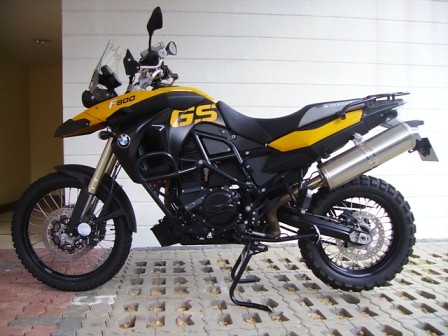
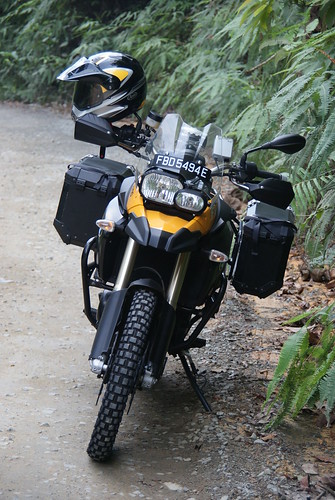
I was late starting off on a sunny Sunday morning in March 2010. A fresh pair of Conti Trail Attack tyres on the steel pony, I wanted a trip on tarmac and I figured these would be better than the TKC80s.

 Leaving Singapore via the Second Link at Tuas I headed into Malaysia and followed the North-South Expressway. I took a wide berth of Kuala Lumpur to the West via the E6 and E35 which delivered me to Rawang, just north of KL.  After 400km of tedious and very hot motorway miles, I head up Route 1 towards Fraser's Hill.

The minute I got onto the fun roads the heavens opened with the kind of tropical rain you can only get in this part of the world.  60km to Fraser's Hill, climbing 1260 metres along twisty roads with severe drop-offs in the rain...nice!

Fraser's Hill or Bukit Fraser is named for the Scotsman who discovered tin ore in the area and mined the wealth with a heap of opium-addicted coolies.  Like Jim Thompson, he mysteriously disappeared one day but the area keeps his name.  It's a small 'resort' area and much less commercialised then Genting or Cameraon Highlands...but the standard of accomodation is pretty dire.  Not a five star hotel to be seen!

Despite the rain, the cooler temperatures were welcome, down from 36 celcius around KL to the mid 20s up in the mountains
PhotobucketI eventually arrived at Ye Olde Smokehouse where they were filming a Malaysian TV show, but luckily they had one room left which I took gratefully.

"Quaint" is the word, a small slice of colonian England in the mountains.  "expensive"would be another word, at over RM300 for a room for the night.  The room was obviously very nice at some stage in it's life, but a little tired and damp.  No heater to dry the bike suit out, and barely any hot water, but I was out of the rain and happy.
Photobucket

PhotobucketNature obliged with some fabulous views when the rain cleared, with some incredible views from the room.
Later on, we were treated to nature's own lightshow when the sun set.  I don't normally post millions of sunset shots, but the colours were amazing:
Photobucket


Photobucket


PhotobucketThe food was good, the mattress lumpy, but the next morning was a whole new (dry) world.

PhotobucketMet this little fellow on my morning stroll...wish I knew how to get better photos of this stuff.


I timed breakfast perfectly to getaway in time to make the 10am  "Gap".  The last 8km of roads to Bukit Fraser are so narrow and winding that the traffic is only allowed one-way at a time.  Odd hours to travel up, and even hours to travel down.

PhotobucketUnfortunately just before I got to The Gap, I stopped to take pictures of the picturesque town square and managed to drop my bike.  On someone's car.  Outside the police station. Doh!  I had to hang around another 90 mins to wait for the 12pm gap.

PhotobucketBut looking at the GPS, I could see that there was fun right around the corner.  Lots of corners.  (This is a thing of beauty when you live in Singapore, where the roads are almost entirely straight and interupted with traffic lights every 500m).

Photobucket Given the late start and thought of a long hot ride back from Cameron Highlands the next day, I decided to have a day on the twisties and followed Highway 55, 8(old), 9 and 61 down to Melaka.
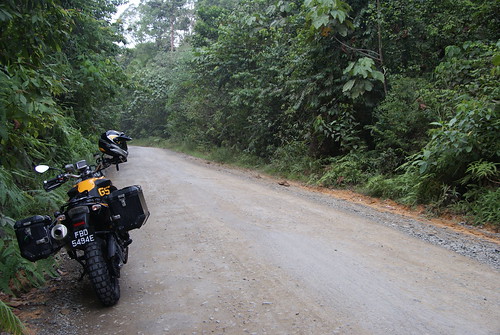
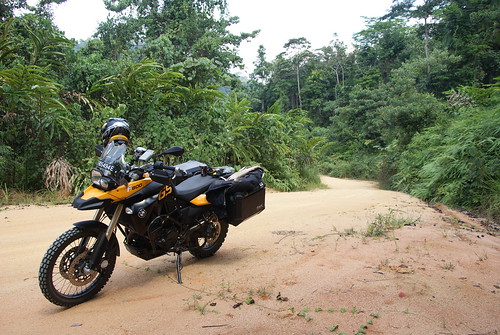
From the start there were no views more than 100m distant, as every corner was greeted with another corner.
Photobucket

Too much riding fun to stop and take pictures.  I mostly managed to keep ahead of the locals on their Honda Wave 125cc scooters.  I guess familiarity with the roads helps when the turns are this thick and fast.

Photobucket
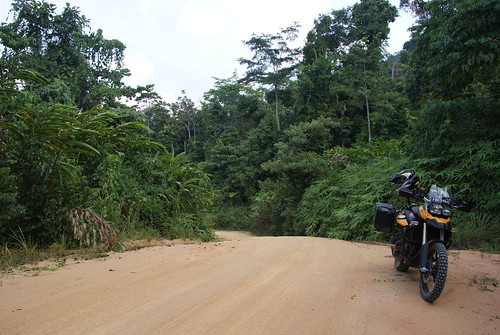
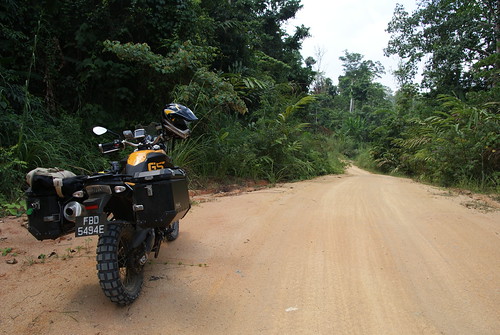
Further down the mountain, the roads began to open up into long sweeping bends that could carry 100km/h without any fuss.  After Singapore, anything less than totally vertical seems like an insane lean angle.

PhotobucketThe air was getting warmer lower down, back up to 28 celcius or so. 

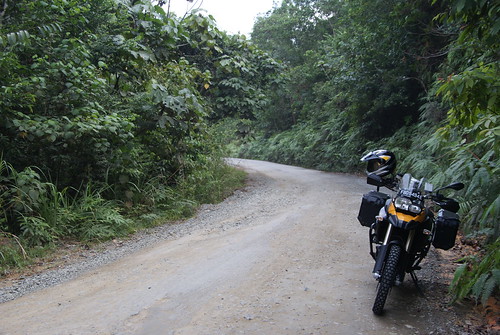
The jungle vegetation and 15m bamboo forests thinned out to open up some spectacular views across the Titiwangsa mountain range.
Photobucket


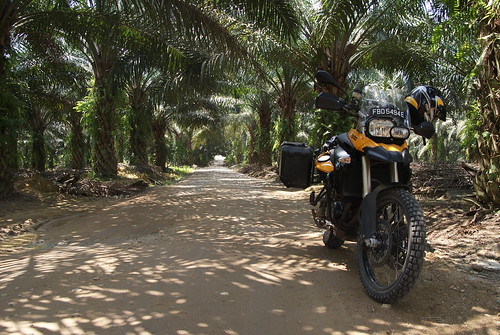
The rest of the route to Melaka was also plenty fun.  No sign of traffic police on the back roads, or maybe it was too hot?  I stopped for Nasi Goreng in one village and felt like a rock star when surrounded by what seemed like the whole village wanting to oggle the bike.  I guess anything over 125cc here is still a novelty.  I was surprised not to see any other big bikes on these roads, it think if I lived in KL all my spare time would be on these mountain roads.

Rain hit again for the final hour's ride into Melaka, and didn't stop until I was nearly back in Singapore the following day.  After another 500km I arrived in Melaka with just enough time to check in, massage and eat before bed.

PhotobucketI decided to splurge and stayed in The Majestic, one of the Small Luxury Hotels of the world.  The room with its 4-poster bed and claw-foot bath open to the room was very nice, and the food was incredible.  Only 5/10 for the balanese massage though, would expect more from an expensive spa resort. 
Photobucket The final leg on Day 3 was a short 250km hop in the rain back to Singapore via a mix of back roads and NSE.  Back into Singapore via the Second Link again and home in time for Cucumber sandwiches.

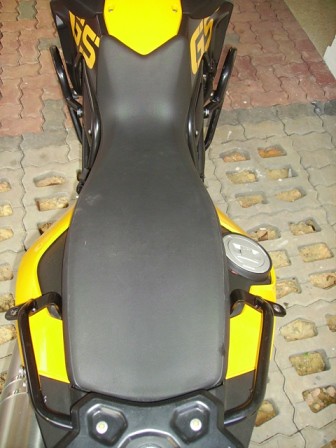
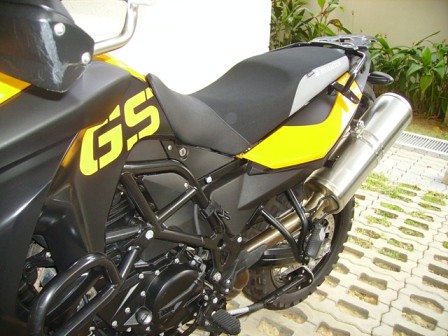
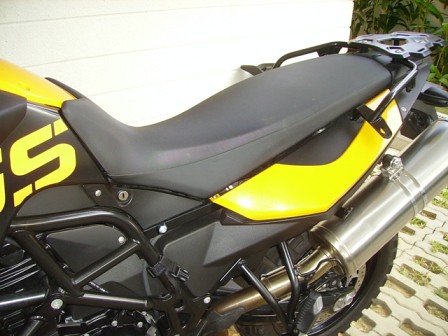
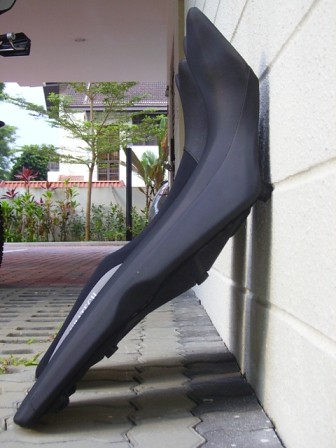
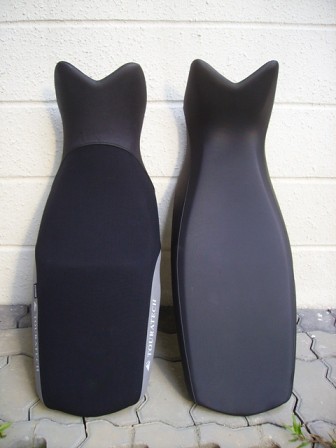
All in all I did around 1200km over the three days, and it was the first proper outing for my Touratech Standard Breathable seat.  Comfort levels after 450km were as good as the first km.  Its a great seat that maximises the long-distance ability of the bike, but in this kind of heat I guess any biker will suffer from monkey butt and a hot arse.  Prickly heat powder liberally applied at every stop helps, but after 6 hours in the saddle I still get hot bits where the back of my thighs meet the seat.

The Conti Trail Attacks are an incredible tyre.  The pattern doesn't suggest much use on trail, and I didn't take on any gravel roads during this outing.  But on the pavement, there was almost no difference between the dry roads and roads with 2" of standing water, I am very very impressed with these tyres.  I am sure better bikers than me will easily scrape not only the pegs but probably the engine casing too with these tyres on.

I've got to say that the highlands of Malaysia are a must-do for anyone biking in the area.  Send me a message if you want a GPX file of my routes.


Read more...

How The Germans Soothe My Bum

02 March 2010

Since moving to Singapore, my bumblebee has given me a severe case of Monkey Butt. The flesh/cordura/plastic interface is made horrible in the heat, and after 300km leaves me crying like a small girl.

So I searched out the seat alternatives, by way of 2 year birthday present to the yellow horse.


I took a look at the Corbin Seat, but it made me feel a bit "meh". If I wanted a Harley seat, I'd buy a Harley.


Then I had a nosey at the Sargent seat which is, for me, a bit OTT with the piped trim.  A bit poncey.  (Image courtesy of http://www.sargentcycle.com/)


All very nice but not what I was looking for.  Over on ADV Rider and the UKGSer forums, there are lots of posts on custom jobs and local guys who work miracles with memory foam.

I decided to take the easy way out with an off-the-shelf saddle from Touratech.

It's not a cheap option, but hey its the bumblebee's birthday.  And it's certainly the easiest option, I don't have to send my original seat away or wait while someone attacks the foam with a carving knife.  I made the decision for the TT seat based on the principle that if I don't like it, I can sell it and revert to the stock seat...this isn't possibly if Freddies Foam Fitters have hacked it up.  (Although in fairness you can probably buy a brand new BMW replacement seat for half the price of the TT seat...).  But the TT seat is the only one with a breathable option.

Now THAT sounds like a cure for Monkey Butt!

Anyway, the seat arrived today so I thought I would share some pix.  This is the Touratech Breathable Standard seat, about $800 Singapore dollars.

Side-by-side comparisons


Notice that the TT seat (on the left) has a distinct step to it, creating a flatter area of support for both rider and pillion.  The BMW is more of a Nike swoosh.


The TT seat is marginally wider at the rider seat/ass interface.  But definately flatter on account of the stepped design.


Off the bike, it seems that the very lowest point of the seat is comparable to the BMW seat, but in all other respects it is higher.  Remember, this is the Standard seat from TT.

Yes, there is a BMW seat alongside.


Here you can see how much higher the TT seat is.


The front portion is some faux leather affair, I guess for the hardwearing crotch zipper area.  The remainder of the seat is a breathable goretex that TT claims allows air to circulate inside the seat.

The underside of the seat is identical to the OEM seat, including the spaces for tools and first aid kit, but minus all the disclaimer stickers.

What is interesting to note, that the stepped design of the seat is not the same as that shown on the website.  Something isn't matching here.


Notice that the TT website picture are all more 'swooshy' like the original BMW seat.  There is no labelling on my seat, but given the height of it, it's certainly not a low seat.
Previously I could just about get both feet flat (I am 5'10" and 32" inseam, in jeans at least).  Now I can't quite manage that, but can comfortably get both balls (of my feet) down.  On the way home I noticed I adopted my usual right foot down position, fully flat and my bum had to shift sideways to achieve that.


So how does it perform?

Erm, well you'll have to wait for an update on that...only rode it 3km home so far, but a 800km jaunt to Kuala Lumpur planned over the next couple of weeks.

Whatever the verdict, I can bet it will be better than the 1cm of 'padding' my mate has on his SuperDuke R.  At least after 300km I can still walk  ;)

But for my next trip, just in case, I'll be taking a large tin of this...


UPDATE - Post ride
I did 1200km over three days through the mountains of Malaysia in temperatures ranging from around 25 celciues to 26 celcius.
I have got to say that the TT standard breathable seat is a million miles better than stock, as far as my own ass is concerned.  Comfort level is vastly improved with a broader, flatter base to move around on.  The front is narrow enough when you need to get up on the pegs, and if you really want to move around and have long enough arms you can sit right back on the pillion ridge.

Although the seat is standard, it is definately taller than than stock and I can't flat foot both feet any longer. It also take my head up into the air stream a bit more, but nothing uncomfortable for me.

It's the heat and sweat that kills me out here, and the back of my thighs get uncomfortable where they meet with the seat.  Prickly Heat powder helps some, but after 4 hours or so its pretty noticeable and uncomfortable.  Would like to hear if other riders in this kind of heat/humidity get the same problem?!

Read more...

First Trip to Malaysia

26 June 2009

So my bumblebee has been with in Singapore for a couple of months now, but work has been crazy so no chance to explore.  Apart from the stop-start traffic in Singapore that is.
Until today.  I took the day off and headed to Malaysia to get some speed, some miles and some unpaved roads under my belt.


I left Singapore at 9.30am via Woodlands checkpoint. I figured it would be quiet going into Malaysia at that time, and I was right.  Lots of dedicated bike lanes - but no white bit of paper (we'll come back to that later).

I followed the roadworks and occasional sign until I hit the E2 North/South Expressway.  Two lanes in either direction, good tarmac and reasonable manners from other people on the road.

My GPS kept screaming about the speed limit - 110kmh.  That's 70mph, yet another hangover from the colonial days . There was the occasional lunatic going at 200kmh, and most of the little scooters toddling along on the hard shoulder at 30kmh.


Lots of rest areas along the way, but I stayed on the E2 until Yong Peng, where I stopped for petrol and a coke.  I filled up 14 litres and it cost something like RM25 which is almost free.  I have to come here more often!


From Yong Peng I took the Hwy 1 then J150 to Bekok and carried on...the tarmac becomes broken tarmac, then occasional gravel.  Then mostly gravel.


  Then  the gravel runs out too.


  Sandy/gritty roads all the way, complete with deep gorges where the rain water has washed the road surface away.

  I was totally in my Simon Pavey moment.  Up on the pegs during the tricky parts, razzing along at a steady 70kmh, slowing down for the corners on account of the loose surface and lack of experience and confidence.

Of course, there are people living out here also...and the kids have to get home from school somehow.

Now, I thought I was doing pretty well with my little 'off-road' excursion...

  ...until dad and son on a little scooter come pootling past. Obviously they do this every day, risking life and limb.

You can see from the photo that in Malaysia (and often in Singapore) there is no need to wear any kind of safety gear.  No boots, helmet, jacket or gloves here - the power of sunshine will protect you.

  Of course, I am sweating my ass off inside my mesh armoured jacket, kevlar jeans and knee protectors and Tech3 boots. I feel a right ponce.  But also slightly glad after taking a couple of corner a little hot and musing on the consequences.

Out here theres little chance of an ambulance, and you can't call the AA...you need to be self sufficient and sure that if you do come off you can still ride afterwards.  Similarly, any problems with the Bike...well there ain't no BMW Assist out here.

About 5kms short of Sg Selai, the sky turned black and I could see lightning in the distance.  Not wanting to be riding on this surface in a downpour of biblical proportions, I figured it was safest to head back to civilization.


I made it nearly as far as the E2 again before the sky opened up on me, so I stopped to put my wet weather gear on.

Thankfully, the temperature dropped to about 32 C, so it wasn't too uncomfortably hot.  But the rain...man can it rain here.

An hour later I was 40kms from Tusa and able to stop long enough to take the wet stuff off.

Passing through Passport control leaving Malaysia, the guy kept asking for my white card.  I had no idea what he meant.  Apparently, you're supposed to fill one out when you enter Malaysia...so why did nobody ask me to on the way in?!?  After telling him I didn't have one several times, he caved in and just let me pass.  Can't see that happening in the UK.

The last hour of the trip was the worst.  Singapore passport control goes like this:
  1. Stop at booth
  2. Remove gloves
  3. Remove helmet
  4. Remove cashcard
  5. Pay toll
  6. Pull forwards then put gloves/helmet back on

Now, you'd expect that at passport control.  The bit that makes me mad is that 20 metres around the corner you have to...

  1. Stop
  2. Remove gloves
  3. Remove helmet
  4. Have temperature taken to make sure you aren't carrying the pig flu
  5. Put gloves/helmet back on


Kind wish they could have taken my temperature at the same time as the passport check, right? But with Singapore's typical efficiency, the passport clerk probably isn't certified to use a thermometer.

Then, to really make my day, a few meters further on I have to stop and go through the whole routine again for customs to inspect my wet gear and empty coke cans in my pannier.

Anyone that has traveled the AYE at 5pm on a Friday will know its quite a demoralizing experience.  My adrenaline high from some excellent biking in Malaysia was quickly damped.   I can't even filter (lane share) with the panniers on, that 800GS is a wide-ass bike!


But all in all, a good first trip to Malaysia, I promise I will have to go more often now.  We're lucky in Singapore to be so close to such excellent biking roads and off-roads, I must make more of my time here.

Read more...

Self Importing a Motorbike from UK to Singapore

12 April 2009

I relocated to Singapore at the end of 2008. With a 10 month old F800GS I figured I could lay her up and reunite on my return to the UK 18 months later. But with a change of job and permanent move to Singapore I realised the bike had to come too.


This is the process for importing a used, right-hand drive bike that has KM/H on the speedo.  I don't know the process for importing a new bike, a left-hand drive bike or MPH only bike.

This is how I did it.


Warning, this is a VERY long post.

First, go to the One Motoring website and download the PDF “Self Import And Register a Motorcycle/Scooter”. It seems daunting! But I called my overseas BMW dealer and got a Certificate of Conformity which has all the technical details, chassis number for my bike an emission test results for my specific bike on a certificate signed by the manufacturer’s test technician.

Ship your bike: I used James Cargo Services in the UK. Literally turn up and leave the bike. They crated it, shipped it and insured it for the journey for £695


Get your Certificate of Entitlement (COE) (category D for Motorcycle). Basically, any vehicle on the roads in Singapore needs a COE, and this can run to $30,000+ for a car! You can check recent values at www.onemotoring.com.sg I used Citibank bidding system. Don’t be fooled by low prices for the first couple of days. Prices rocket in the last couple of hours as the bids come in. Look at prices from the last few auctions and be prepared to pay a few hundred over that price. Place your bid there; you will pay only the closing price if you are successful. (e.g I bid $1500 but ended up paying $958). LTA will send you your COE letter a week later to the address you used for the bidding exercise.


Need to get vehicle valued by Customs. Go to Customs Appraisal Section, Revenue House, 55 Newton Road and get a blank form “Declaration of Facts for Motor Vehicles” and their fax number to submit them. Also get the phone number of a guy in the Motor Vehicle department so you can phone him direct if you have a problem. Then assemble the following:


a. Completed form “Declaration of Facts For Motor Vehicles”
b. Certificate of Conformity (CoC if it’s a EU bike, or CIC for a Japanese bike)
c. Registration/Deregistration document (for used bike)
d. Dealer Original Sale Invoice
e. Dealer Statement of current value (for used vehicle – VERY HELPFUL!)
f. Bill of Lading (from your shipping agent)
g. Freight Papers & Invoice
h. Shipping Insurance Papers & Invoice


Fax the above documents to the number on the completed Declaration. They will fax you the valuation which you need to pass to your inward agent.


Call an agent to pay the duty and tax (Joint Inward and Payment levy via TradeNet) I used SpeedTrac Services Pte Ltd +65 6546 0339. These guys took the valuation and handled all payments for me, then delivered my crated bike to my home address. Very convenient and I don’t know how you would do it without an agent. The costs break down:


a. Terminal Handling Fee                                                                        $30.25
b. LCL Charges                                                                                         $63.12
c. Delivery Order Fee                                                                              $60.00
d. Agency Fee                                                                                           $35.00
e. PSA Forklift Fee                                                                                   $65.00
f. D/Order Processing & Tracing Fee                                                    $35.00
g. Warehouse Charge                                                                               $30.00
h. Inward Customs Declaration & Stamp Fee                                      $110.00
i. Despatch Customs Handling Fee                                                         $120.00
j. Delivery to my home address                                                              $120.00
k. Store Rental & Removal Fee                                                              $150.00
l. Customs Duties (12%) & GST (7%)                                                    $2455.78
m. TOTAL:                                                                                               $3304.15


I had to pay the agent cash when they delivered the bike. The above charge for Warehouse and Store Rental & Removal could have been avoided if my agent had been able to get the Inward Declaration on a Monday. Be warned: Your customs valuation is only valid until the following Monday at Midnight. At this time, Customs update their exchange rate for valuation, so the valuation may go up or down in value depending on the currency shift. The value has to match the figures that your agent enters on the TradeNet payment system. So I had to reapply for a valuation on the Tuesday morning and it delayed getting my bike by a couple of days, hence the warehousing charges from the Port Authority.


Now, having been delivered my bike was no longer covered by shipping insurance, so the day before I got insurance. You can use the obvious people like Axa, Mitsui(?), AIG, NTUC but I went with Liberty City State who match NTUC for price but have a better reputation for paying out in the event of a claim. Some won’t cover you on a foreign licence or without experience of driving in Singapore. Comprehensive insurance for my bike was $1177, which is about the same as the UK. Not bad without any NCD.


Apply for Vehicle approval either via VITAS online (not worth setting up an account for one vehicle import) or at 10, Sin Ming Drive Vehicle Engineering Division. You can download the application for Vehicle Batch Approval from the VITAS website in advance. Take all the same documents as you sent to customs for the valuation plus the following:


a. Passport (they don’t like FIN in the system!)
b. Technical Catalogue for your bike. Whatever the CoC says might not match the technical details from the manufacturer, and you’ll need the tech details to complete the “walk-in application for vehicle batch approval”.
c. They wanted pictures of my bike, but processed without them and told me to ask the test centre to take them
d. They turned my documents around in 4 hours and faxed me a pre-approval, asking me to present my bike for inspection (Vehicle Batch Approval Inspection).


(NOTE: Don’t get tied up at the front desk at the LTA at 10 Sing Ming Drive. For the Vehicle Engineering Division, turn left at the front desk and walk through the building until you are out the other side. Then turn left and follow the road to the last big building on the opposite side of what looks like an open test area. Go into the office there and the receptionist will help you.)


Once in-principal approval is given, arrange the bike to be inspected at any VITAS test centre


a. I tried phoning VICOM, but they gave me the run around on the phone, kept me on hold for ages and then disconnected me several times. So I phoned STA. They said just turn up with the bike any time, inspection would last about 30 mins. Go early in the morning and there is no queue! Details of all test centres on VITAS website, I chose a centre on Sin Ming Road for convenience (and closest to my home). 
b. Take copies of all your documents, but all details should be on the pre-approval from LTA.
c. No need to collect your originals from LTA at Sin Ming drive yet
d. My bike failed the inspection! Bikes in Singapore are required to have a rear mudguard that covers at least half the wheel to avoid flicking stones up at following cars. Obviously, looking around Singapore most people remove these between tests! Next to the STA inspection centre is a load of vehicle workshops and I managed to get a $10 mudguard for a Honda scooter. The Inspection guys even helped me bolt it to the bike for the inspection photos.
e. Once the bike passes inspection, they ping the details electronically to the LTA Vehicle Engineering division who fax the Vehicle Approval Code to you a few hours later.
f. Cost of STA Vehicle Batch Approval Inspection:                                             $32.10
g. Cost of transporting bike to/from test centre:                                                 $160


(I used Bikebulance +65 6425 5333 to get my bike to the test centre and back, and the guy waited during the 40 minutes of inspection and mudguard buying. But there are others who can tow.)


Collect your original documents from LTA Vehicle Engineering office then it’s back to LTA Quota & Registration to register the bike with following documents:

a. Complete Form R01 (can download in advance from onemotoring.com.sg)
b. Notice of Approval from LTA c. VAC from test centre d. COE Letter e. Passport f. Insurance Cover Note g. Original Sales Invoice h. Inward Cargo Clearance Permit i. I also gave them the customs valuation to calculate the Additional Registration Fee, to be on the safe side.


I didn’t have my Vehicle Approval Code (VAC), as I had only just completed the inspection. But I submitted the application and then faxed the VAC a couple of hours later when I received it.


Then a couple of days later, collect from LTA Quote & Registration Section the following:


a. Registration Notification Letter
b. Validated Road Tax Disc
c. Official Receipt
i. Cost:                                                                                                       $2883.75


Use these documents to get some plates made up for front AND rear of the bike.


a. I got my rear plate and front sticker made at Juzz Wheels
b. Cost:                                                                                                         $20


Fix the registration plates then drive straight to dealer to get IU fitted. This gizmo takes a cashcard and is used to automatically deduct tolls on busy roads and payments in car parks.
I used STA.. They helped me wire it IU to the battery and zip-tie the IU to the handlebars to get me home. Now I am on the hunt for a bracket.

Cost: $155.80


Finally, import complete!


TOTAL COSTS:
a. Shipping, Crating, Insurance
                                                                                            £695/$1529.00
b. Duty/Tax/Port Charges & Delivery
                                                                                                       $3304.15
c. Bike Insurance
                                                                                                       $1177.00
c. Application for Vehicle Approval
                                                                                                       $74.90.00
e. Vehicle Approval Test
                                                                                                       $36
f. Transporting bike to the test centre and home again
                                                                                                       $160
g. Register/Additional Reg Fee/Road Tax/COE
                                                                                                       $2883.75
i. Get registration plate/sticker made
                                                                                                       $20
j. Get UI fitted
                                                                                                       $155.80
k. TOTAL OTR:
                                                                                                       $9,340.60.
n. (TOTAL COST OF USED BIKE + IMPORT)
                                                                                                       $21,640
o. (TOTAL COST OF NEW BIKE BOUGHT LOCALLY)
                                                                                                       $30,000


A final word – was it worth it? Hell yeah! I love my bike and wouldn’t want to be without it. It is a time-consuming process but I managed it with only a couple of odd hours off work. And the figures speak for themselves. And don’t forget, once imported your bike will adopt the local valuation...which is probably more than you paid in the first place.

I'm not one for a lot of attention, but this bike turns a lot of heads in Singapore.  :)


EDIT: I got a bracket for the IU at Seng Kwang Metal at #05-31 AMK Autopoint, 10 Ang Mo Kio Industrial Park 2A. This place is run by a couple of very handy brothers called Gilbert and William. They custom crafted the bracket for my bike, positioning the IU exactly where I wanted it. It took all of 20 minutes and cost me $80. Excellent service. I will be back with other welding needs to these guys.

Read more...

One week on a Harley

01 March 2009

So I was in Las Vegas on business, and I decided to take a week of vacation while I was there, rent a Harley and live the American Dream for a while.


Day 1 Vegas to Zion National Park (166 miles)

I left my hotel and headed to Eagle Rider to grab my bike. I chose a Road Glide, mostly because I didn't want the high pillion seat of the Electra Glide, but I did want a decent fairing and accessory socket for my Zumo. The bike comes with two decent hard saddlebags too.

I took my draggin' jeans and sidi courier boots with me, then I hired an old-school leather jacket and helmet there. The helmet was a 'bowl' thing that seems very common over there - you know, so you can feel the wind in your face. (More on this later). Along with my Ray-Ban Aviators I was all set to look very cool

The bike rental was a very efficient process and they gave a good briefing on the bike. I was apprehensive about a 1582cc twin monster between my legs and riding with feet forwards, but they make you do a lap around the block before taking off, and within 200yds the bike makes sense. Its as easy as...riding a bike! All the big Harleys share this same engine. It vibrates and throbs violently at idle, but the vibes really disappear at speed. The torque is massive and you can stay in 4th all day if you like, but the power roll-on is very lazy so it needs a shift down to get a move on for overtakes.

Heading out of Vegas on the i-15 freeway on a strange bike is a bit nerve-wracking for the first time, but soon got into the flow of things. At points, this freeway has a 75mph limit and I quickly realised that although I looked dead cool in the Aviator glasses, all that space around the eyes means a lot of wind in the eyes. I was squinting like I was constipated, but 60 miles or so north of Vegas I saw a sign for a Harley Dealership. £15 later and wearing some nice HD wraparound glasses I was off again, and this time I was able to see.


I made it to Springdale, slightly south of Zion National Park by the mid-afternoon and checked into a very nice motel there. Traffic is banned along most of the scenic drive through the park, so you take a shuttle. But the time I made it into the park, the sun was setting:

With a bright sky and shadowed mountains it was breath-taking, although not the best time for photos.


Arriving as late as I did, I didn't have to pay to enter the park in the evening.


Day 2 Zion to Capitol Reef Nat Park via Bryce Canyon (208 miles)


The following morning I splashed out $80 for pass that gives entry to all US National Parks for a year. I rode half-way up through the park to stunning vistas, and turned right onto Route 9, which was a biking highlight of the trip.

This Route 9 heads east through a 1 mile tunnel, followed by the Mount Carmel hwy, which has a series of fabulous twisties that are even fun on a Harley.


There are scenic viewpoints every half mile or so it seems where you can stop, admire the view and take pictures. Although it can be 75 miles between gas stations or places to grab a drink.


I should add at this point, that after my ride from Vegas to Zion, I had a sore throat by the time I got there. The hot wind, the dust in the air and general dryness wasn't helping. By the morning when I set off for Bryce Canyon I was into a full-blown cold. The day before I realised that water in the panniers gets hot very quickly in these temperatures, so I spent a whole $2 on a polystyrene cooler in a gas station and tied it to the back of the bike. It doesn't look cool, but the water is chilled. Just the thing for a developing cold and sore throat.


Anyways, I picked up Route 12 which continues east, up to an elevation of around 9600 feet.


Route 12 continues to climb to the north-east, and the plateau below is more green than the Canyons.

At one stop I met a group of five other HD riders who had also come from near Vegas. They said the dust and pollen count was particularly high, so I wondered if my 'cold' was in fact hayfever. In any case, I got my buff out and did the rest of the trip with my face covered.


My coolness is deserting me by the second! But inside I am more comfortable.

I was able to score some drugs from these riders (Claritin for my Hayfever) and they rode off.


This picture is not me! Just a friendly HD rider. Apparently, HD riders dressed like this are not necessarily "friends of Dorothy", so be careful not to make any unwanted passes.


Next stop was Bryce Canyon, another National Park and absolutely stunning. Less heard of than its Grand cousin, but equally impressive in its beauty, and less busy. 


I only stayed a couple of hours, but it would have been nice to spend more time in this area. I was supposed to meet with a couple of guys from Utah that I met at the BMW off-road school in Wales, but our dates got muddled and they came and went 24 hours earlier.


I stopped shortly before Capitol Reef National Park for the night in another nice motel.


Day 3 Capitol Reef to Monument Valley via Glen Canyon (210 miles)


The journey south-east was spectacular, including Glen Canyon and some nice vistas


My Zumo directed me towards Monument Valley and somehow we had to get from nearly 10,000 elevation to sea level. The road to do that would have been scary on my 800GS with TKCs on, but on a 700lb Harley I was very nervous tackling this:


All gravel road, with a speed limit of 5mph. No barriers to the drop-offs in the event of a slide. RVs are banned from this Route 261.


This mad road was followed by streches of long, straight highway to Monument Valley. By this time I was feeling dog rough and had already gone through 3 litres of water. I needed to find a bed to crash out, so I motored through monument valley and didn't stop for pictures. I stopped in Kayenta for the night in a shoddy motel that was very expensive, as there is nothing for miles in any direction.


Day 4 Monument Valley to Grand Canyon South Rim (158 miles)


Feeling slightly better today after a decent rest yesterday. Passed through a couple of reservations and entered the Grand Canyon from the east.

The first stop is the Desert View lookout:


There are loads more stops (and a million more pix) along the road that runs round the South Rim of the Canyon. This is the Grand View lookout:


I carried on to Tusyana, just south of the Canyon to check into my motel. Having showered and stuff I headed back to the Canyon during sundown to enjoy the view some more. This was Mather Point.


It was kind of hazy during sundown, so I didn't quite get the pictures I was hoping for, but the view in real life was amazing. It's hard for my small brain to comprehend the sheer size of this canyon, the pictures never do it justice.


Day 5 Grand Canyon to Kingman via Historic Route 66 (184 miles)

Heading back west towards Vegas, you can leave the I-40 and take some smaller roads that are part of the old Historic Route 66. Well worth it, as the passing traffic is avoided and you get all these nice roads to yourself. You pass through a load of almost-ghost towns, towns that would probably have died were it not for the resurection of the Route 66 as an historical scenic drive. Loads of typical american diners in these towns, and a chance for some amazing breakfasts


Funny thing happened today - as I was whizzing along, I got hit by a big bug on my forehead, in the gap between my glasses and helmet. I stopped in Kingman for the night - not a glamorous place in any sense, mostly motels and a massive railroad interchange. The freight trains were incredible, they were like quarter of a mile long!

Anyways, around midnight I started with a fever. Whether it was a result of the bug exploding in my forehead (it caused a gash) or whether it was the cold breaking into a fever I don't know, but I seriously though I was going to die in this dodgy motel room in Kingman. The fever lasted 8 hours, with me wrapped up in every sheet in the room. It was horrible. I took Nurofen and Dayquil in the morning, and felt human enough for the last run back to Vegas.


Day 6 Kingman to Vegas via Hoover Dam (105 miles)


A short blast today, and more than enough given how I was feeling. The Highway actually goes over the Hoover Dam itself. This strech back into Nevada was the hottest of the trip and probably the lowest elevation. The traffic was moving at around 25mph for 20miles either side of the dam, this was the only time I took my leather jacket and gloves off for the whole trip. On the whole, the rest of the journey was fine with all my gear on.


There are free car park/look outs either side of the dam, but if you want to park and go inside it costs $$$. I was still feeling rough so I skipped that.


I made a last dash for Vegas, looking forward to crashing out in a decent hotel again. However, it looks like the travel agent stiffed me and the accomodation was not exactly what it sounded like when I booked it:


All in all it was an amazing 6 days. I had a great time, ate a lot of bad food, saw some amazing sights. Only slightly marred by being ill, and if you're going to feel shitty its better to feel shitty at 90mph with the wind in your hair then lying in some crappy motel room. :)


If I did the trip again I would take my full face helmet, or buy one there. They can be had pretty cheap. If the weather was going to be any hotter I would look for an armoured mesh jacket too. You could easily stay somewhere central like Page, Arizona and ride out to a different park or monument every day for two weeks. Or you could easily spend a week in any of the National Parks hiking and taking photos. I only had six days and the pace was about right. The Road Glide was armchair comfy, and you need to stop for a drink before your bum gets numb or the bike gets thirsty. Its a different kind of ride to the GS, but equally valid! Although, given the option I'd like to rent a GS in this area in the future, there are trails and gravel roads everywhere and it made me long for my F800GS a few times.

The photos on this trip were taken with my new Sony Alpha A200 with a Tamron 18-250 travel lens. And I picked up a $12 tripod over there and dumped it at the end of the trip.

Here is the Mapsource plan of my route:


And there you have it.


View One Week On A Harley in a larger map


Read more...

About This Blog

I had been saving for a ST1300 for a long time, as it was clear that my Deauville wasn't up the task.

In November 2007 I saw pictures of the F800GS and ran to the dealers to place a deposit.

On 13th March 2008 I took delivery and have never regretted it.

On 13th April 2009 my 800GS joined me in Singapore for a new life and adventures...

This is my F800GS Blog.

Followers

  © Blogger templates Newspaper by Ourblogtemplates.com 2008

Back to TOP